When I first introduced my new ruler - LEFT-EZE™ Rule - HERE -
I used the PROTOTYPE when I took the photos.
This tutorial has been REVISED to include photos of the FINAL VERSION -

And shows you how I use the ruler to cut -
Half-Square Triangles (HST) -
And Quarter-Square Triangles (QST) for Hourglass Blocks -
And Flying Geese units -
LEFT-HANDED!! - ;))
=================================================
This tutorial is to demonstrate my new LEFT-EZE™ Rule -
And - just for fun -
I thought that I would do it in the form of a REVIEW -
Using the same format that I used to review the EASY SQUARE JR.
By Sharon Hultgren - EZ Quilting - Antioch, TN USA 37013
www - dot - ezquilting - dot - com - Made in China
My FAVORITE SQUARE ruler - ;))
So here goes -
============
LEFT-HANDED QUILTING - Review - Ruler - LEFT-EZE™ Rule
============
Note - these instructions are written in LEFT-EZE™.
If you are right-handed - just reverse the directions.
============
Today I want to show you a REALLY cool little ruler -
That Left-Handed Quilters can use - hassle-free - ;))
My
But first -
Disclaimer -
I AM affiliated with the manufacturer or supplier of this product -
I did not get this product for FREE in exchange for a review - aka barter.
I designed it and I paid for it.
I have no intention of slandering or libeling anyone or any product.
I am simply stating my opinions - I could be wrong - you may disagree.
My opinions are based on my experience with this product - your results may vary.
I think that about covers it - if I missed something - let me know.
I am not a lawyer - and I am just trying to cover my assets. - ;))
===
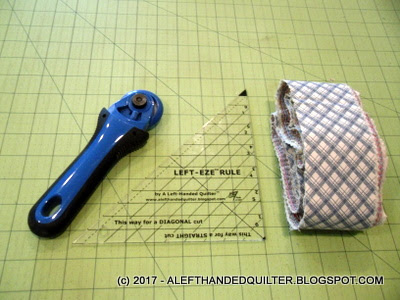
It’s called the
LEFT-EZE™ Rule
By A Left-Handed Quilter™
www - dot - alefthandedquilter - dot - blogspot - dot - com
Made in the U.S.A.
Description -
This little ruler is a LEFT-Triangle - ;))
It can be used to cut Half-Square Triangles (HST) -
And Quarter-Square Triangles (QST) for Hourglass Blocks -
And Flying Geese units -
And Squares -
LEFT-HANDED!! - ;))
It measures 6-1/2” - technically 6-7/8" - but who's counting -
It has a 1/4” dashed line on the longest side - the "hypotenuse" - for those who remember your high school Geometry class - so that you can see that the "black tip" in the top right corner is a "dog-ear" that will be automatically cut off because you are using pre-cut strips - ;))
===
Where you can get it -
For now this ruler is not available in your Local Quilt Shop -
Or from your favorite suppliers -
It is only available from me - on my blog(s) -
I set up another blog for my "shop" - LEFT-EZE™ Rule - HERE -
I will be posting various tutorials and information there as well -
You can email me at - caseyq19 - at - gmail - dot - com -
And put "Order" in the subject line -
The cost is $24.95 plus shipping/postage and sales tax if applicable -
Similar sized rulers on the market are priced at the same amount -
And mine is special - different - and LEFT-HANDED - ;))
I will accept personal checks until I get set up with PayPal -
Please understand that it's only me -
And this will all be very "low-tech" until it becomes "high volume" - ;))
===
What I LIKE about this ruler -
It's LEFT-HANDED!! - ;))
The easy-to-read numbers down the right side -
The fact that the numbers read 1-2-3-4-5-6 from TOP to BOTTOM -
In the LEFT Column when you can read "This way for a DIAGONAL cut" -
And that they also read 1-2-3-4-5-6 from TOP to BOTTOM -
In the LEFT Column when you can read "This way for a STRAIGHT cut" -
And it has a "hang-hole" in the BOTTOM LEFT corner - ;))
===
What I DON’T like about this ruler -
There are no “grabber” thingys on the bottom side -
So it MAY slip on your fabric -
But that’s not really something that bothers me -
Because I don't usually have that problem -
And there are plenty of options available if you choose to add them - ;))
===
How to USE the ruler -
Start with some pre-cut strips -
Either from your scrap bag -
Or of the size stated in a pattern -
You can also determine the width of strip that you want/need -
By using the LEFT-EZE™ Rule SIZE CHART -
Available on the LEFT-EZE™ Rule blog - HERE - ;))
===
How I use it to Trim the Selvage end of the strips -
For Half-Square Triangles (HST) -
Start with two contrasting strips -
(I used pre-cut 2-1/2" strips for these demos)
And place them right sides together -

Line them up with a horizontal line on your cutting mat - to keep them straight -

TURN the ruler so that you can read - This way for a STRAIGHT cut -

Line it up with a vertical line on your mat -
With the strip between ANY two horizontal lines -
Using the other horizontal lines to keep the ruler straight -

Cut UP the LEFT side of the ruler -

===
How I use it to Cut a Half-Square Triangle -
TURN the ruler so that you can read - This way for a DIAGONAL cut -

Line up the RIGHT side of the ruler along the cut edge of your strips -
With the "black triangle tip" at the TOP RIGHT of the strip -
The bottom of the strips will line up with a line on the ruler depending on its width -
Using the other horizontal lines to keep the ruler straight -
Cut UP the LEFT side of the ruler -


TURN the ruler so that you can read - This way for a STRAIGHT cut -

Line up the RIGHT side of the ruler along the cut edge of your strips -
With the "black triangle tip" at the BOTTOM LEFT of the strip -
The top of the strips will line up with a line on the ruler depending on its width -
Using the other horizontal lines to keep the ruler straight -
Cut UP the LEFT side of the ruler -


Sew them along the LONG/DIAGONAL side - starting at the "flat" end -

Press them open -

Use the diagonal line going from the corner to the center of the long side to trim the dog-ears -
The numbers down the LEFT column will help line up the bottom of the HST -

Does it "measure" 2-1/2" square? -
Yes, it does - ;))

===
How I use it to Cut Quarter-Square Triangle units -
To make an Hourglass Block -
Using two contrasting strips - right sides together -
TURN the ruler so that you can read - This way for a DIAGONAL cut -
And make the first cut exactly the same way you did for a HST -

TURN the strip -
So that the cut edge lines up with a horizontal line on your cutting mat -

Using the DIAGONAL lines -
Line up the RIGHT side of the ruler along the cut edge of your strips -
With the "itty bitty - black triangle tip" at the BOTTOM LEFT of the strip -
The TOP of the strips will line up with a line on the ruler depending on its width -
Using the vertical lines to keep the ruler straight -
Cut UP the LEFT side of the ruler -


TURN the ruler -
Line up the RIGHT side of the ruler along the cut edge of your strips -
With the "black triangle tip" at the TOP RIGHT of the strip -
The bottom of the strips will line up with a line on the ruler depending on its width -
Cut ACROSS the TOP side of the ruler - From LEFT to RIGHT -

One HST - and two QST -

Sew the QST along the SHORT side -
Keeping the same fabric on top -
And sewing from the "flat" side -

Press them open -

Match the two sides -

Stitch them together -
Trim the dog-ears -
Using the diagonal line going from the corner to the center of the long side -
The numbers down the LEFT column will help line up the bottom of the block -

Do they measure 4-1/2" square - Yup! - ;))

If you cut QST in sets of two - you can start and end with a HST - ;))

===
How I use it to Cut a Flying Geese Unit -
I took two of the QST from above to use as the "Geese" units -
And used two strips - folded over onto themselves -
Because you need two "mirror image" "Wing" sections -
You need both a LEFT and a RIGHT wing for each "Geese" section -

I layered the white/flower strip on top of the blue strip -
To cut four layers at the same time -

Cut the HST just like before -

Then cut another set just because -


Opened them up -

Matched them to the "Geese" units -
With the "flat" sides at the top of the unit -
And the "pointy" ends at the bottom -

Started with one of the RIGHT "Wings" -
And put it on top of the "Geese" -
Right sides together -

Stitched them together -

Pressed them open -

Added the LEFT "Wing" -

Flipped them over so I could sew from the "flat" side -

Pressed them open -

See the "extra" blue on the right side -
That's for your 1/4" seam allowance when you sew it to the next unit or block -
So you don't cut off the point -

Trim the dog-ears like you did the HST -

And it measures 2-1/2" x 4-1/2" - ;))

So -
From two pre-cut 2-1/2" strips - I made all of this -


Which can be arranged to make this -

Or this -

Or this -

The possibilities are endless - ;))
===
Bottom line -
No more "flipping" rulers - OVER - BACK - or SIDEWAYS -
The numbers go in the CORRECT direction -
And are EASY TO READ -
Because -
It's LEFT-HANDED!! - ;))
Would I recommend this ruler?
YES - ;))
===
Talk to you later - gotta go - gotta sew -